windows内核驱动 1-环境搭建
简而言之就是
- visual stdio 2019
- windows SDK
- windows WDK
如果vs没有kernel的项目的模板,找到vs目录的WDK.vsix即可
关于调试
windbg调试器
同时windows 虚拟机我使用的是 vmware,添加了一个COM串口
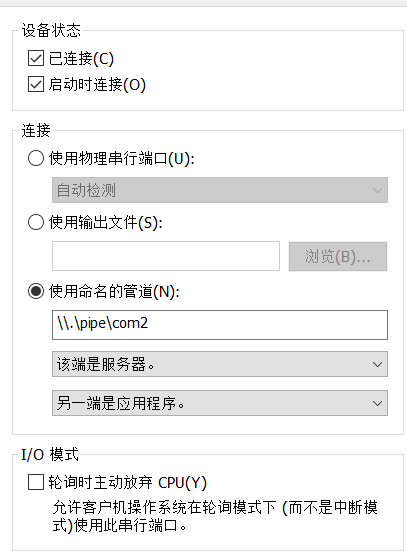
加载驱动
使用KmdKit
windows设置
msconfig -> 调试 -> COM2 …
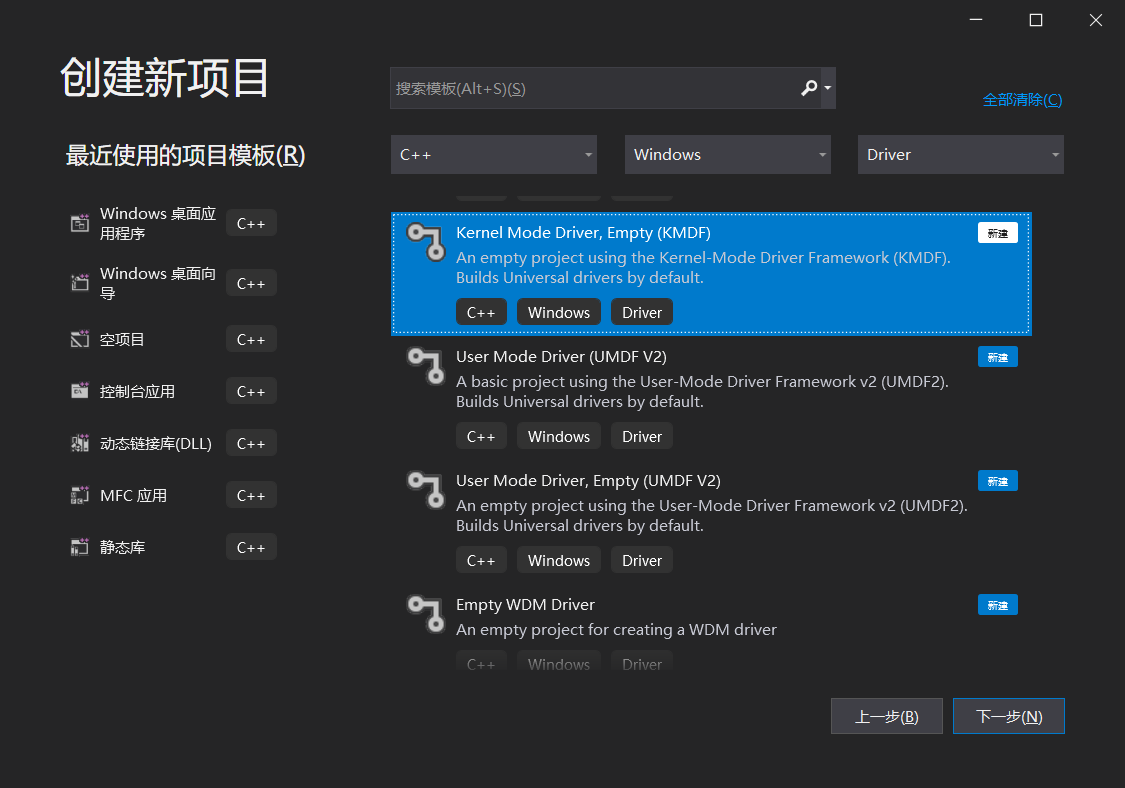
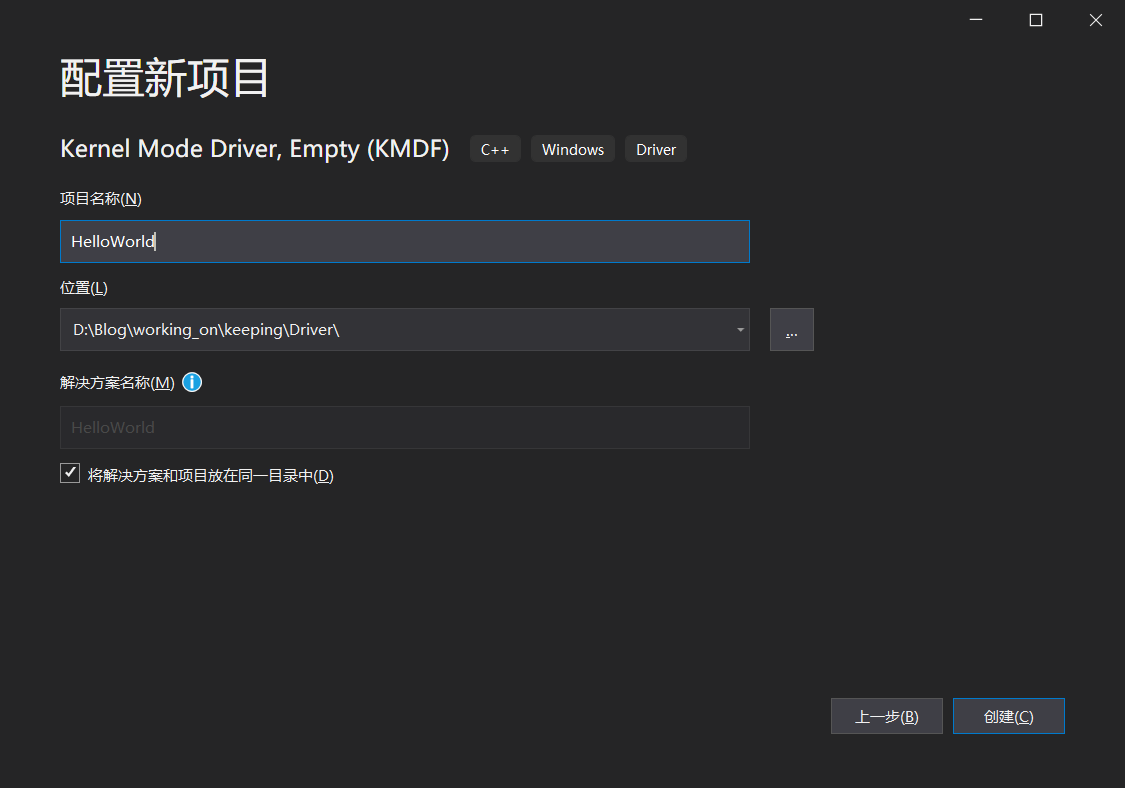
最简单的hello world
-
打开vs,找到KMDF (kernel mode driver empty)
-
设置驱动项目
-
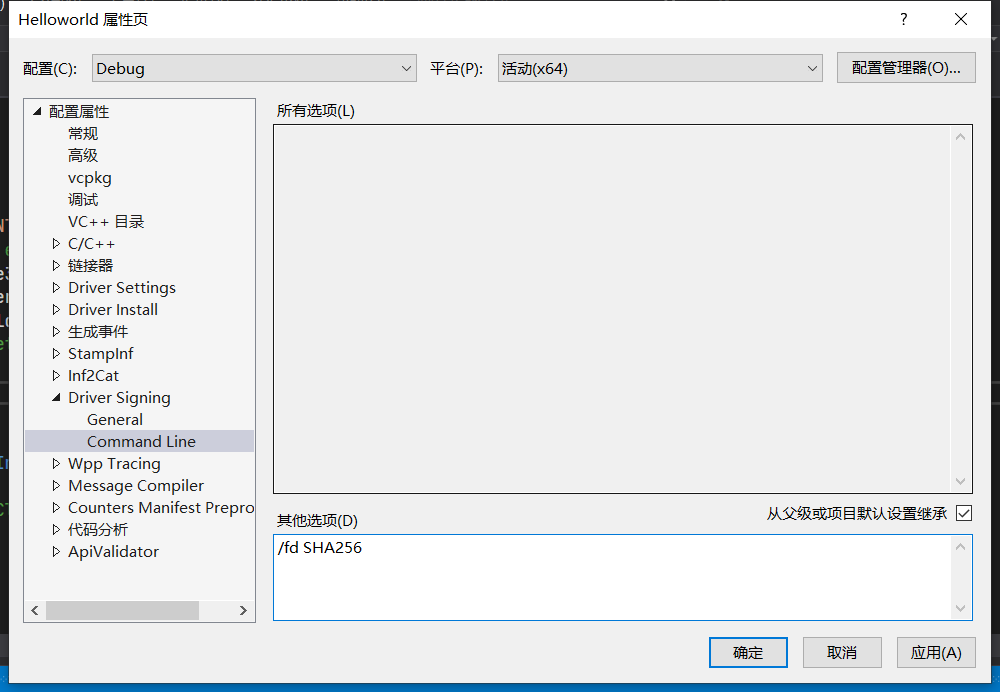
取消晚上12点后编译报错
项目 -> 属性 -> Inf2Cat -> Use Local Time
-
-
代码
main.c
// 驱动卸载函数
VOID
DriverUnload(PDRIVER_OBJECT DriverObject)
{
UNREFERENCED_PARAMETER(DriverObject);
DbgPrint("Bye\n");
}
// 驱动入口函数
// System 在内核模式下运行该函数
NTSTATUS
DriverEntry(PDRIVER_OBJECT DriverObject, PUNICODE_STRING RegistryPath)
{
UNREFERENCED_PARAMETER(RegistryPath); //宏防止编译器报错
DbgPrint("Hello World!\n"); //调式输出
DriverObject->DriverUnload = DriverUnload; //驱动卸载函数
return STATUS_SUCCESS; //加载成功返回码
}-

Class改为
Class=SystemClassInstall32 直接删除两行(就是直接把这个属性删除了)

-

-
-
使用加载器加载
-
使用KmdManager

-
使用windbg x64调试
File -> Kernel Debug
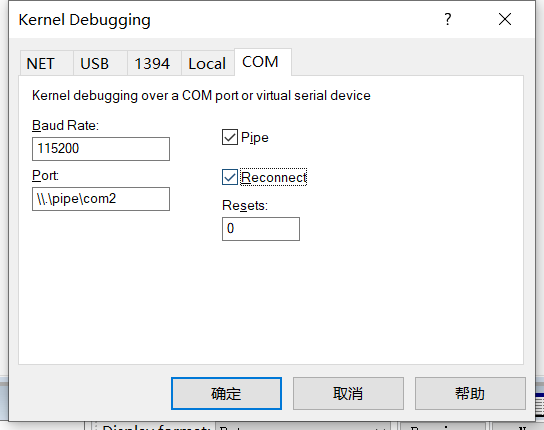
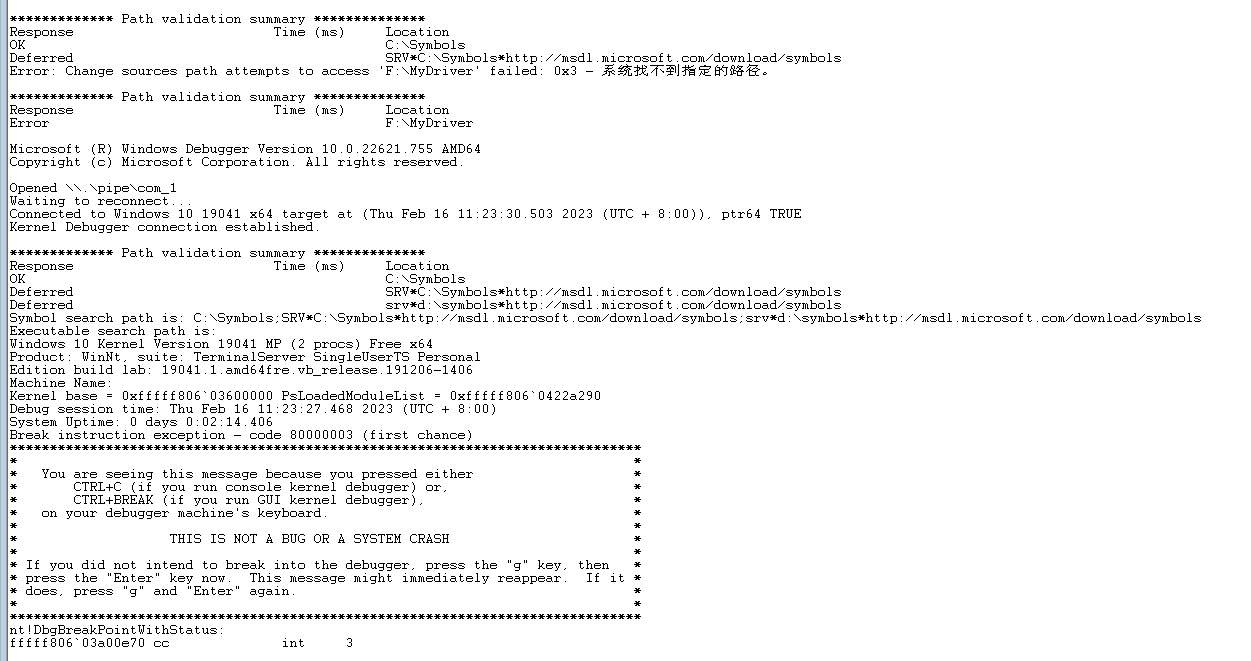
-
-
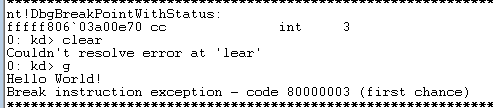
F5继续过后在虚拟机里面运行
All articles on this blog are licensed under CC BY-NC-SA 4.0 unless otherwise stated.
Related Articles
2026-05-01
【Win Pwn】Windows10 内核VS池溢出利用
Windows 10内核池溢出— VS类型 公众号:https://mp.weixin.qq.com/s/W2oLq7VqeQpmPpzdBOqw7g 或许我们的公众号会有更多你感兴趣的内容 在HEVD练习上有这么一道题,是TriggerBufferOverflowNonPagedPoolNx __int64 __fastcall TriggerBufferOverflowNonPagedPoolNx(void *UserBuffer, size_t Size){ PVOID PoolWithTag; // rdi DbgPrintEx(0x4Du, 3u, "[+] Allocating Pool chunk\n"); PoolWithTag = ExAllocatePoolWithTag(NonPagedPoolNx, 0x1F0u, 'kcaH'); if ( PoolWithTag ) { DbgPrintEx(0x4Du, 3u, "[+] Pool Tag: %s\n"...

2024-01-25
【Win Pwn】HEVD-内核栈溢出(上)
开始做HEVD来熟悉windows的内核漏洞利用方式时,发现大多数的资料依旧基于windows7,但是目前主流的操作系统已经是win10,所以还是得更上时代潮流的 文章已在先知社区投稿:https://xz.aliyun.com/t/13363 0. 前置环境 更基础 WIndows10 Vmware虚拟机 Visual Studio 2019,有WDK Windbg Preview(我用单纯是觉得更好看) 最重要的HEVD项目:https://github.com/hacksysteam/HackSysExtremeVulnerableDriver,我直接下载的3.00 Release版 我使用的Windows版本是 I. 编程环境 如果你想快速搭建一个驱动开发环境可以参考B站上的一些资料,如:配置驱动开发环境 如果按照步骤vs没有KernelModDriver这一模板,找到vs目录的WDK.vsix双击即可 一段驱动的主要代码,在main.cpp中编写 #include <ntifs.h>#include "win10.h"#inc...
2026-05-05
windows rookit防护-PatchGuard
笔者能力有限(还是太菜了😢),还是推荐看原文:https://blog.tetrane.com/downloads/Tetrane_PatchGuard_Analysis_RS4_v1.01.pdf PG的初始化阶段 A,调用链 首先找到ntoskrl.exe中最大的函数开始定位 首先比较内核是否处于调试状态,处于调试则不激活PG。(loc_140A1AF13是一个死循环) 重命名sub_140A1AEE4为PgInitialization然后查找引用 只是根据参数进行PG的初始化,所以重命名为PgInitialization_w,他的交叉引用又是 根据文献[1]的描述,PG的实例化是KiFilterFiberContext在boot阶段被调用的。 The initialization of PatchGuard is performed mostly by KiFilterFiberContext. This function is called at the beginning of the boot, before any user driver lo...
2024-03-17
windows内核驱动 3-文件操作
之前写过:windows内核驱动 1-环境搭建、windows内核驱动 2-页表探索 但是内容确实有点衔接不上,这里根据【Win Pwn】HEVD-内核栈溢出(上)中展示的基础技巧来继续 项目结构优化 之前写过的所有功能都在main.c中,新加入IoctlFuncs,这里来写所有的ioctl功能,那么就要重新设计MyControl PIO_STACK_LOCATION pStack = IoGetCurrentIrpStackLocation(pIrp);ULONG ioCode = pStack->Parameters.DeviceIoControl.IoControlCode;ULONG inLen = pStack->Parameters.DeviceIoControl.InputBufferLength;ULONG ioInfo = 0;switch (ioCode){case IOCTL_MUL:{ DWORDLONG inData = *(PDWORDLONG)pIrp->AssociatedIrp.SystemBuf...
2024-01-25
【Win Pwn】HEVD-内核栈溢出(下)
上:https://joe1sn.eu.org/2024/01/25/win-hevd-exp-stackoverflow-I/ 中:https://joe1sn.eu.org/2024/01/25/win-hevd-exp-stackoverflow-II/ 文章已在先知社区投稿:https://xz.aliyun.com/t/13365 本附录对第二章的以下几个遗留问题做出说明 user编程寻找ROPGadget shellcode编写 Token提权 KVAS user编程寻找ROPGadget ROP全称加返回导向性编程,比如这一章用到的Gadget pop rcxretmov cr4, rcxret 关于ret汇编本质上就是从栈帧中取出值,然后将ip寄存器设置为该值,等价于pop ip,这样就能完成函数调用的返回等等。 本章中当我们发生栈溢出时,就会把ret的位置设置为第一段gadget的位置 pop rcx就会将此时栈顶的值0x00000000002506f8存入rcx寄存器,然后ret又从栈顶取出地址mov_rc4_rcx_ret,然后rip寄存器就跳转...
2025-04-16
【Win Pwn】Windows10 内核池溢出
内核也太难了,主要讲述大NonPagedPool的溢出利用 公众号:https://mp.weixin.qq.com/s/XjaPdNwqABFqDZsZTDtZJg 或许我们的公众号会有更多你感兴趣的内容 【复现】Windows10 内核池溢出 前置知识: windows内核调试 windows内核提权基础 简单的windows驱动编写(hello world级别) linux pwn堆溢出利用方式 一点点数据结构的知识(双向链表) 文章讲述并复现在Windows高版本内核中NonPagedPoolNx溢出的利用方法 目录 [toc] 利用方式 很多资料都是直接翻译外文文献,翻译质量差,没有直接的实操,并且随着windows的更新,比较缺乏现代windows 10\11的、比较易学的攻击方式。这里使用:Windows-Non-Paged-Pool-Overflow-Exploitation[1]作为基础的讲解,原文中的图示个人感觉还是讲的不够透彻,这里个人借着原文重新讲述下。 命名管道介绍 这是windows提供的用于进程间通讯的一种机制。首先是**服务...